
How to Set Up AuK: A Local, Uncensored Voice Model
Written by Clement
AuK is a 1.5B open-source speech model from Tencent Hunyuan, Shanghai Jiao Tong University, and the Shanghai Innovation Institute: zero-shot voice cloning from a short reference clip, text-to-speech, and instruction-driven speech editing (replace a word, change the emotion, remove background noise) all through one model. This walks through running it on a rented cloud GPU via ComfyUI, the same RunPod path used for the local image-model setup, so you don't need your own GPU to try it.
What AuK does
One model covers four jobs a voice pipeline usually needs separate tools for: zero-shot voice cloning (feed it a few seconds of reference audio, it speaks your text in that voice), plain text-to-speech, natural-language speech editing ("replace 'yes' with 'no'", spoken as an instruction rather than a re-record), and cleanup (denoise, separate speech from background audio, or shift emotion and timbre). AuK-Flash, the distilled variant bundled in the same install, trades a small amount of quality for roughly 4.5x faster generation, useful once you're iterating on a line rather than generating it once.
Nothing about the model or this setup applies a content filter to what you type as the instruction. That's the same trade-off as the local image and companion-chat guides on this site: full control over output, and full responsibility for what you generate.
Create a RunPod account
- 1
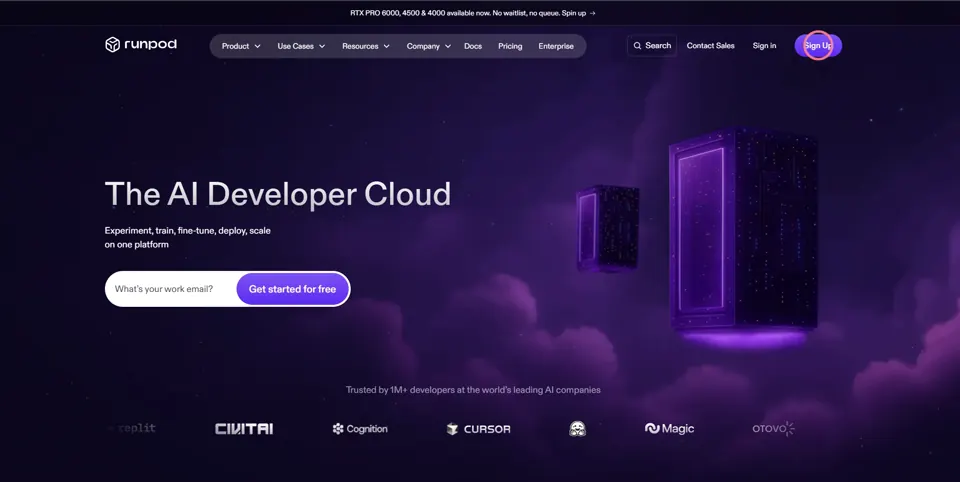
- 2
Add funds to your account
$10 is enough for many hours of testing: AuK's checkpoints are small (a few GB total), so most of your session time goes to actual generation, not downloading.
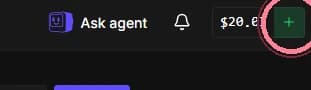
Configure and deploy the pod
This setup installs the w4a8-quantized diffusion checkpoints (the smallest variant, sub-1GB each) paired with the bf16 text encoder, matching ComfyUI-AuK's own official example workflow so nothing needs renaming once it loads. That combination fits on a mid-range current-generation card; you don't need a flagship GPU.
- 3
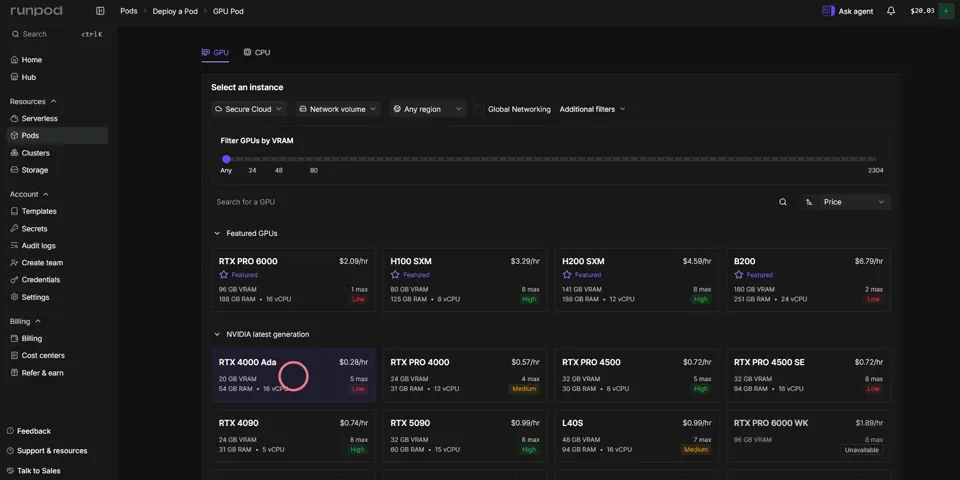
Pick a GPU with 16GB VRAM or more
From the dashboard, click Pods in the left nav, then Deploy Pod. Sort by VRAM and price, and pick a current-generation card in the 16-24GB range.
- 4
Set the pod template to a PyTorch build
Runpod Pytorch 2.8.0 is the current default template; it ships CUDA and PyTorch pre-installed. If a different template is selected, hit Change template and pick it from the list.
- 5
Expose the ports ComfyUI needs
Under Expose HTTP ports, set 8888,4000,8188,8889. 8188 is ComfyUI's default port; the others cover Jupyter and any auxiliary service.
- 6
Set container disk to at least 40GB
The checkpoints plus ComfyUI and its Python environment fit comfortably in 40GB; the default network volume size RunPod suggests is fine too.
- 7
Deploy On-Demand
On-Demand bills per second of actual usage, no upfront commitment, right for testing before you know how much you'll use this.
Get new guides by email
One email when we publish new guides and model breakdowns. No spam, unsubscribe anytime.
Run the setup script in Jupyter
- 8
Open Jupyter Lab
On the pod's Connect tab, port 8888 shows "Jupyter Lab, Ready." Click it.
- 9
Download the setup script
Grab setup_auk_comfyui.py below and save it locally.
Download the setup script (.py) - 10
Upload the setup script
In Jupyter, upload the file you just downloaded into /workspace.
- 11
Open a terminal and run the script
python setup_auk_comfyui.py. It clones ComfyUI, installs the ComfyUI-AuK custom node, and downloads the AuK Base, AuK-Flash, Qwen text encoder, and VAE checkpoints.
Open ComfyUI and load the workflow
- 12
Go back to the pod's Connect tab in RunPod
Same screen you used to open Jupyter.
- 13
Open port 8188
That's ComfyUI's default port, already exposed from the pod-template step above. Click it once the setup script finishes.
- 14
Close the pop-ups
ComfyUI opens with a couple of dialogs on top. Close them to get to the empty canvas.
- 15
Download the workflow file
Grab the .json workflow below. It's AuK's own official text-to-speech example, loading the model, encoder, and VAE loaders plus an instruction-encode node pre-filled with a sample voice description and line.
Download the workflow file (.json) - 16
Drag and drop the file onto the canvas
The full node graph appears: Model Loader, Encoder Loader, VAE Loader feeding into Instruction Encode, then Generate/Edit, then Save Audio.
Install missing nodes and run your first generation
- 17
Click the Manager button, then Install Missing Custom Nodes
The workflow references the ComfyUI-AuK node pack your fresh install doesn't have registered in Manager yet; this lists it.
- 18
Select all, install, then restart ComfyUI
Click the install button, wait for it to finish, then click the red Restart button and confirm. Reload the browser when prompted.
- 19
Set the loaders to the installed filenames
The workflow's Model Loader, Encoder Loader, and VAE Loader nodes already point at the filenames the setup script downloaded (auk_base_w4a8.safetensors or auk_flash_w4a8.safetensors, qwen_omni_bf16.safetensors, auk_vae.safetensors), so no renaming is needed unless you download a different precision variant.
- 20
Edit the instruction, then Execute
In Instruction Encode, replace the sample voice description and line with your own, leaving the audio input disconnected for plain text-to-speech. Click Execute, top right.
Hardware and software checklist
This setup installs the w4a8 diffusion checkpoints with the bf16 text encoder, ComfyUI-AuK's own default pairing. The fully unquantized bf16 diffusion + bf16 encoder combination needs roughly 25GB of VRAM per Tencent's own published figures for the base model.
| GPU | 16GB VRAM or more with this setup's w4a8/bf16 checkpoint mix |
|---|---|
| Container disk | 40GB or more |
| License | AuK's own weights are MIT; the bundled Qwen2.5-Omni-3B text encoder ships under Alibaba's Qwen Research license, not MIT. Check that license before commercial use of the encoder |
Troubleshooting
| Out-of-memory error | Switch the text encoder from bf16 to the smaller int8 or w4a8 variant on HuggingFace, or reduce generation length |
|---|---|
| Generated speech cuts off mid-word | Increase the seconds/duration setting on the Generate/Edit node |
| Output doesn't sound like the reference clip | Use a longer, cleaner reference clip with minimal background noise; a few seconds of clear speech clones more reliably than a noisy one |
| Missing custom node after loading the workflow | Run Manager's Install Missing Custom Nodes again and confirm ComfyUI-AuK finished cloning before retrying |
Frequently asked questions
- What is AuK, and who made it?
- AuK is a 1.5B open-source speech model from Tencent Hunyuan, Shanghai Jiao Tong University, and the Shanghai Innovation Institute, released under an MIT license, covering zero-shot voice cloning, text-to-speech, speech editing, and audio cleanup in one model.
- Do I need a GPU to run AuK locally?
- Yes, this setup runs through ComfyUI, which needs an NVIDIA GPU. The w4a8 diffusion checkpoints plus bf16 encoder this guide installs run in well under 16GB of VRAM; the fully unquantized bf16 combination needs closer to 25GB per Tencent's own figures.
- What's the difference between AuK Base and AuK-Flash?
- AuK-Flash is a distilled variant that runs 4-step inference without classifier-free guidance, roughly 4.5x faster wall-clock than Base, at a small quality cost. Both are installed by this setup; pick per generation depending on if you're iterating or finalizing.
- Can AuK clone a voice from a short clip?
- Yes, zero-shot: feed a short reference clip into the Instruction Encode node's audio input, and AuK speaks your text in that voice with no fine-tuning or training step required.
- Is running AuK on RunPod free?
- No, RunPod bills per second for GPU time. A mid-range 16-24GB card at RunPod's On-Demand rate, combined with AuK's small checkpoint downloads, keeps a testing session cheap, but it's not free the way running fully on CPU (like this site's local companion-chat guide) is.
- How is this different from using ElevenLabs?
- ElevenLabs is a hosted service: no setup, but usage-based pricing, an account, and its own content policy. AuK runs entirely on hardware you control, with no per-generation fee once the pod is running and no content filter on the instruction text, at the cost of the RunPod setup in this guide and the GPU rental while it runs.
Keep reading
How to use ElevenLabs Voice Changer to keep one voice across a whole video
How to use ElevenLabs' Voice Changer (speech-to-speech) to replace your recorded voice with one consistent voice across a long video assembled from several separate AI generations.
How to Set Up YuE2: A Local, Open-Source AI Music Model
Install YuE2, m-a-p's open-source 3B music model, on a rented RunPod GPU through ComfyUI: an editable musical score generated first, then a full song with vocals and accompaniment rendered from it, no account or per-generation fee once it's running.

How to Set Up a Local NSFW Image Model: Full Tutorial
Install an adult image-generation workflow on a rented cloud GPU: RunPod, ComfyUI, a real workflow file, and every step in between, screenshot by screenshot.

How to Make AI Porn: The Full Pipeline, Idea to Finished Video
The real production method behind a finished AI adult video: script first, repeatable character and scene sheets, then generation, then stitching it all into one clip with one consistent voice.
Get new guides by email
One email when we publish new guides and model breakdowns. No spam, unsubscribe anytime.