
How to Make AI Porn: The Full Pipeline, Idea to Finished Video
Written by Clement
Most "AI porn generator" content is a tool list. This is the method I use to go from an idea to a finished clip: write the script first, build reusable character and scene references, generate with the right technique for each shot, then stitch everything into one video with one consistent voice.
Skipping the planning stage is the single biggest reason a generated video looks inconsistent. Jumping straight to a prompt gets you one good clip and no way to repeat the character in the next one. This guide assumes you're comfortable running your own generation setup rather than depending on a hosted app. If you haven't done that yet, the image-generation section below links to a full walkthrough first.
Stage 1: write the script first
I always start with the full script before touching a generation tool: the dialogue, the scene list, who's in each scene, what happens in each one. Writing this down first is what makes every later stage possible. A scene list tells you how many distinct settings and characters you need, so you're not discovering that mid-generation. Dialogue written in advance is what a voice-generation step (stage 4) needs to produce lines that match, instead of generating filler and patching it later.
How to write a script for an AI-generated video covers the format in full: locking every character and location up front, and planning each scene's exact start frame, end frame, duration, dialogue, camera move, and sound before you generate anything. The short version: write scenes, not vibes. "Two characters, a bedroom, one leads into the next scene" is not a script. A script names who says what, in what order, and where the camera would be if this were shot for real.
Stage 2: build repeatable character sheets
Once the script names your characters, build a character sheet for each one before generating a single scene. A character sheet is the fixed description you reuse in every prompt (face, hair, build, any tattoo or marking) so the same person shows up in scene 4 as in scene 1. Without one, every generation is a new roll of the dice on what your character looks like.
Write more than one version of the sheet when the script needs it: one per outfit or state of undress the character appears in, each one locking everything except that one variable. A script that undresses a character partway through needs a clothed version of the sheet and an undressed one, not a single fixed description asked to cover both.
How to build a character reference sheet covers the actual technique: generating every angle of a character (front, both profiles, the back) in one image, then feeding that whole sheet back in as the reference for every later generation instead of a single source photo. This is also where a LoRA earns its cost: once a character sheet is locked, training a LoRA on it is what makes that exact face and body repeatable across dozens of generations instead of drifting a little further each time. The LoRA guide linked below covers when a LoRA is worth the setup and when a well-written character sheet alone is enough.
Related now
What already exists on this site for the character-consistency problem.
Stage 3: build repeatable scene sheets, then generate the images
Same idea as the character sheet, applied to the setting: a scene reference sheet locks the room, the lighting, and the camera framing so a scene you return to later (say, the same bedroom in scenes 2 and 5) looks like the same room both times. Write it once, reuse it as an ingredient in every prompt for that scene. How to build character and scene reference sheets covers both techniques, including the exact prompt for a location turnaround.
GenLovers already has a full walkthrough for the image-generation stage itself, including the RunPod cloud-GPU setup, the ComfyUI workflow file, and real cost numbers: read the local NSFW image model setup guide linked below rather than repeating it here. The one addition specific to a video pipeline: generate at a resolution and aspect ratio your video model accepts, checked before your first run, not after. An image cropped or resized at the video stage reintroduces the artifacts the image stage was supposed to avoid.
Full image-generation walkthrough
Screenshot-by-screenshot setup, a real ComfyUI workflow file, and real per-image cost.
Stage 4: pick the video technique that matches what each shot needs
Before generating a single clip, decide which video-generation approach the shot needs, because the three main techniques trade off against each other in a way that matters for a multi-scene video, not just a one-off clip.
Reference-to-video follows your text prompt the most closely of the three: it's the one to reach for when the shot is really about a specific described action or camera move, and you're willing to accept more variation in the character's exact appearance from generation to generation.
Image-to-video (first-frame only) locks the starting frame to your exact character sheet and scene sheet, so the shot opens on precisely the character and framing you built, but you don't control where the motion ends up. Good for a shot where the start matters more than a specific ending.
First-frame-last-frame (FFLF) locks both ends: you control exactly how the shot starts and exactly how it ends, which is what makes long, multi-scene sequences hold together without drifting. The tradeoff is the same one every current video model has with this technique: giving it two fixed points to travel between makes the motion in between less free than reference-to-video, and sometimes visibly more constrained than a single first-frame generation. How much of that trade you're willing to make is a real judgment call per shot, not a solved problem. The longer-videos guide below covers FFLF's mechanics in full, including the one detail that decides whether it holds quality indefinitely or inherits chaining's drift: generate each keyframe as its own image, never extract one from an already-rendered clip.
MiniMax H3 is worth calling out specifically here: it's a current open-weight option that generates video and audio together in the same pass, which sidesteps stage 5's sync problem entirely for any shot it handles.
Video-generation guides
Pick the technique that matches what the shot needs.
Reference-to-video
Follows your text prompt most closely; more variation in exact character appearance per generation.
Image-to-video
Locks the starting frame to your character and scene sheet; the ending is up to the model.
First-frame-last-frame and getting past the clip-length limit
Locks both ends of the shot; the technique multi-scene sequences need to hold together.
MiniMax H3, local setup
An open-weight model that generates video and native audio together in one pass; full ComfyUI install walkthrough.
Get new guides by email
One email when we publish new guides and model breakdowns. No spam, unsubscribe anytime.
Stage 5: one consistent voice across every clip
Every separate generation produces its own voice, even for the same character, so once your scenes are stitched together the voice audibly changes from clip to clip. This is the pipeline problem most tutorials skip, and it's the difference between a finished video and a collection of clips.
If every shot in a scene used reference-to-video with the same pre-generated audio track fed in as reference, the voice stays consistent by construction, because it's the same audio file driving every generation in that scene. The catch: that only works when your technique choice for the whole scene is reference-to-video with audio input, which isn't always the right call per stage 4 above.
When that's not the setup, the fix is to unify the voice after the fact: run every clip's generated audio through ElevenLabs Voice Changer, which replaces the voice in an already-recorded track while keeping the original timing and delivery. Point every clip at the same target voice and the whole video reads as one consistent character, regardless of how many separate generations it took to build the scenes. How to use ElevenLabs Voice Changer walks through the tool step by step.
If you'd rather not run every clip through a hosted service, AuK is an open-source alternative that does zero-shot voice cloning and instruction-driven speech editing on a rented GPU you control, no account or per-generation fee once it's running. It's more setup than ElevenLabs and needs a GPU pod, but the tradeoff is no content filter on the instruction text and no usage-based billing.
Voice Changer only handles speech: it does not generate or clean up moans, grunts, or other non-verbal sounds. Describe those directly in the video-generation prompt instead, and a LoRA trained specifically for that kind of sound gets noticeably more precise results than describing it in plain text alone. This is also why sequencing matters: once a scene moves from dialogue into a stretch with no speech, only moans and sound effects, stop running that stretch through Voice Changer entirely. There's no voice left to unify, only sound the video model already generated.
Voice consistency guide
How to use ElevenLabs Voice Changer
Replace the voice in each clip's audio with one consistent target voice, without losing the original delivery and timing.
Set up AuK (local, open-source)
The self-hosted alternative: zero-shot voice cloning and speech editing on your own rented GPU, no content filter, no per-generation fee.
Stage 6: assembly
If a scene's video and audio came from the same generation (MiniMax H3's native audio path, or reference-to-video with pre-generated audio), assembly for that scene is close to a formality: check sync, trim, export. Once the voice-unification pass from stage 5 runs on the rest, line up each clip's audio against its own video timing (which rarely matches on the first attempt after a voice swap), then re-encode everything to one final container and resolution.
Background music is optional and comes from one of two places: some video models generate it as part of the clip itself, or you generate a separate music track with a dedicated tool like Suno or Udio and layer it under the finished edit. Neither is required. Review the finished clip with sound on before treating it as final: the reference-to-video and image-to-video guides above both flag that current video models aren't fully reliable on audio when they attempt it natively, which is part of why the voice-unification pass in stage 5 exists as a separate step rather than something you can skip.
Resolution, quality, and total length are all your call, not a fixed rule this pipeline imposes. Decide the render quality per clip at generation time in stage 4, and the finished video's length falls out of the scene count you settled on writing the script in stage 1. That flexibility, chain together whatever the story needs, is the point of building the pipeline this way instead of generating one clip and stopping.
What can go wrong at each stage
| Character drifts between generations | Lock the character sheet's wording, reuse it verbatim in every prompt, and train a LoRA once the sheet is stable |
|---|---|
| Character's outfit or state of undress is inconsistent mid-scene | Write a separate character-sheet variant for each outfit/undress state the script calls for, rather than one sheet covering all of them |
| Scene looks different across generations of the same setting | Lock a scene sheet the same way as the character sheet; reuse it verbatim rather than re-describing the room each time |
| Video stage: limbs or hands warp during motion | Simplify the source pose before animating; complex overlapping limbs are the most common video-model failure point |
| FFLF motion looks stiff or constrained | That's the tradeoff for locking both ends; switch that specific shot to image-to-video or reference-to-video if the motion needs to be freer |
| Voice changes between clips of the same character | Run every clip through ElevenLabs Voice Changer targeting the same voice before final assembly |
| Moans or sound effects come out flat or generic | Describe them directly in the video-generation prompt; a LoRA trained for that specific sound outperforms plain-text description |
| Voice Changer distorts a moan or non-speech sound | Don't run it through Voice Changer at all; it's built for speech, not non-verbal sound, so cut those stretches out of that pass |
| Audio/video out of sync at assembly | Re-check the exact frame rate and duration of both files before syncing, especially after a voice swap; a mismatch of even one frame compounds over a multi-second clip |
| Final export looks worse than the source clips | Match the export resolution and bitrate to the highest-quality source stage; downscaling then re-upscaling loses detail permanently |
Frequently asked questions
- What's the actual AI porn generator pipeline, not just a tool list?
- Write the full script first, build reusable character and scene sheets from it, generate each shot with the video technique that matches what it needs, unify the voice across every clip, then assemble the final file. Most "AI porn generator" tools bundle all of this into one interface, but they're separate technical problems underneath, and understanding them separately is what lets you fix one stage when a hosted tool's all-in-one result comes out wrong.
- Why write a full script before generating anything?
- A script is what tells you how many characters and settings you need, so you're not discovering that mid-generation. It's also what a voice-generation or voice-unification pass needs: dialogue written in advance produces matching lines, instead of filler you patch in later.
- Do I need a LoRA for character consistency, or is a character sheet enough?
- Start with a well-written character sheet, reused verbatim in every prompt. A LoRA is worth training once that sheet is stable and you need the exact same face and body across dozens of generations rather than a handful.
- Which video technique should I use: reference-to-video, image-to-video, or first-frame-last-frame?
- Reference-to-video follows your text prompt most closely, at the cost of more variation in exact appearance. Image-to-video locks the starting frame to your character sheet but leaves the ending open. First-frame-last-frame locks both ends, which is what holds a multi-scene sequence together, at the cost of motion that can read as more constrained than the other two. Pick per shot based on which tradeoff matters more for that specific moment.
- How do I keep the same voice across clips that were generated separately?
- Run each clip's audio through ElevenLabs Voice Changer, targeting the same voice for every clip. It replaces the voice in an already-recorded track while keeping the original timing and delivery, so the whole video reads as one consistent character even though the audio came from many separate generations. The free plan covers about 10 minutes a month, enough to test the workflow, but it carries no commercial usage rights.
- Can ElevenLabs Voice Changer fix moans or sound effects too?
- No, it only processes speech. Moans, grunts, and other non-verbal sounds need to be described directly in the video-generation prompt instead, and a LoRA trained for that specific sound gives noticeably better results than plain text. Once a scene has no more dialogue, only non-verbal sound, stop running that stretch through Voice Changer entirely.
- What about background music?
- Optional, and it comes from one of two places: some video models generate it as part of the clip itself, or a separate track from a music-generation tool like Suno or Udio gets layered under the finished edit in stage 6.
- What resolution, quality, and length should the finished video be?
- Whatever the project calls for. Decide render quality per clip at generation time, and the total length falls out of the scene count in the script and the clips you chain together from it. There's no fixed answer here by design: a longer video in this pipeline just means writing more scenes and stitching them together.
- Do I need a powerful GPU for all of this?
- The image stage runs on a rented cloud GPU for around $10 for roughly 35 hours of use, per the local NSFW image model setup guide. Video generation is more demanding; MiniMax H3's local setup guide documents running on 16GB+ VRAM. Neither stage strictly requires owning hardware.
- Can I use a real person's face or voice?
- Only with that specific person's informed, documented consent for this exact use. Without it, this is illegal in a growing number of jurisdictions regardless of how the video was produced, for both the face (image/video stage) and the voice (stage 5) independently.
- Is making AI porn for personal use legal?
- Generating fictional adult content privately is legal in most jurisdictions. What's illegal everywhere: any sexual depiction of a minor, non-consensual use of a real person's likeness or voice, and using generated content to harass or defraud. This isn't legal advice; when in doubt, don't generate it.
Keep reading
How to write a script for an AI-generated video
A script format built for AI video generation, not film: every scene planned with its start frame, end frame, duration, dialogue, camera move, and sound, so each clip can be generated on its own and still cut together as one continuous video.
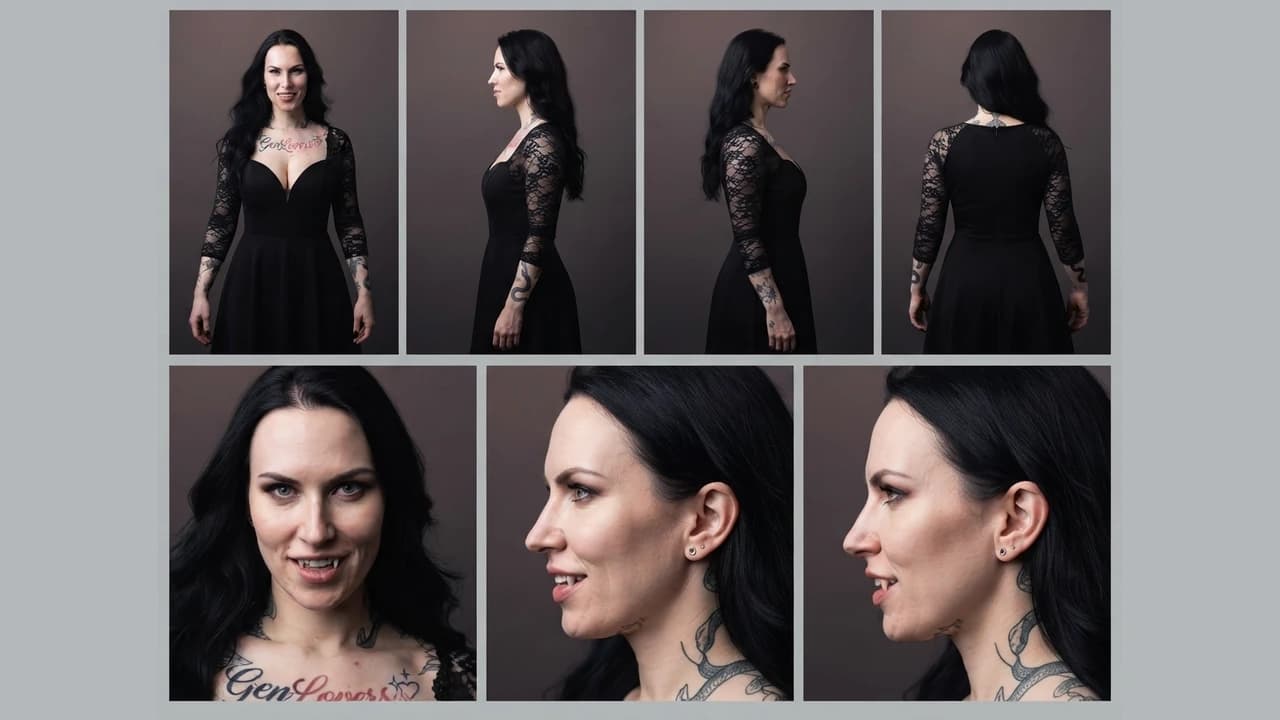
How to build character and scene reference sheets for consistent AI video
How to generate technical turnaround sheets for a character and for a location, then use both as persistent references across image and video generation, so the same character and the same setting hold from shot to shot.
How to use ElevenLabs Voice Changer to keep one voice across a whole video
How to use ElevenLabs' Voice Changer (speech-to-speech) to replace your recorded voice with one consistent voice across a long video assembled from several separate AI generations.
How to Set Up AuK: A Local, Uncensored Voice Model
Install AuK, Tencent's open-source 1.5B speech model, on a rented RunPod GPU through ComfyUI: zero-shot voice cloning, text-to-speech, and speech editing with no account, no content filter, and no per-second usage fee once it's running.
How to Set Up a Local NSFW Image Model: Full Tutorial
Install an adult image-generation workflow on a rented cloud GPU: RunPod, ComfyUI, a real workflow file, and every step in between, screenshot by screenshot.
How to run MiniMax H3 locally in ComfyUI
Install MiniMax H3 in ComfyUI: the right FP8/INT8 files for your GPU, the license restriction to check first, and all three workflows, step by step.
Get new guides by email
One email when we publish new guides and model breakdowns. No spam, unsubscribe anytime.